
Propagating From Seeds: Growing Vegetable Seedlings
The new year has started, the beds are planned, and with spring the anticipation of most gardeners is rising. Fingers are itching to sow the seeds you've collected yourself or bought and start growing vegetable plants. Before you get started, there are a few things you should know about growing your own seedlings. We give you an overview and tips about growing.
This Article Contains:
Quick Overview
Growing: The right time & place
- For the cultivation of most plants it is sufficient to start with the pre-cultivation at the end of March, only for peppers and chilies you should start already in the middle of February.
- You can also give your plants a head start in the greenhouse or cold frame, but before March it is too cold for most plants without heating.
Seedlings: The right conditions
- Sufficient moisture, light, the right temperature, growing soil and sowing depth (light or dark germination) are the be-all and end-all of seed raising.
- By pre-swelling you can give your seeds an advance, especially with poorly germinating or old seeds this can be very helpful
Do not forget to prick
- As soon as the 2nd pair of leaves has formed, you should prick out your plants, i.e. separate them.
Greenhouse, Windowsill or Cold Frame: How to Propagate?
You're looking forward to the gardening season and want to grow your own seedlings, but wonder where the perfect place is? Windowsill, greenhouse or cold frame are popular places to grow seeds. No matter where you grow your seedlings, there are a few points to keep in mind when growing them to ensure healthy young plants:
- You should not start growing plants too early, because healthy seedlings need sufficient light (follow the time instructions on the seed packet):
- From the end of January, lettuces and cabbages can be pre-sprouted (you can also pre-sprout seed potatoes).
- From mid-February, you can start growing peppers, chillies and eggplants.
- From the end of March, tomatoes, zucchini, pumpkin and cucumbers can be sown.
- Sufficient moisture is important for your seedlings, but they should not stand in water, then mold will quickly appear.
Propagating Plants on the Windowsill: The Right Habitat for Plant Pots
- A bright window is very important so that your plants get enough light
- A constant room temperature ensures that the seeds germinate well
- The ratio of temperature and light must be right - if the temperature is too high but the light is too low, your plants will grow quickly but become thin and weak.
- A windowsill does not offer much space - space-saving seed pots are useful
- Avoid direct sunlight
Greenhouse or cold frame: Raising plants
- During frosts your plants may still be too cold, then you should protect them with a fleece or similar.
- Sowing of heat-loving plants should not be done before March in unheated greenhouses and cold frames.
- Avoid direct sunlight
- Especially tomatoes, peppers, melons, lettuce and beans can be grown well in the greenhouse.
For more on when you can start sowing your plants indoors or outdoors, see our article Planting Calendar Vegetables.

Preculture or direct seeding?
To bring forward plants or not to bring forward - that is the question here. Some plants need to be pulled forward in our latitudes. Otherwise, their harvest period is very short, because they can usually be planted out only after the icemen. Other vegetable plants like to be pre-cultivated only a little. More detailed information on this topic, and which plants should be pre-cultivated and which not, can be found under pre-cultivation or direct sowing.
Grow your own seedlings: Here's what you need
Although there are a few things to consider when growing seedlings, you don't need much to grow your own. In fact, you can easily make or upcycle many things yourself at home. For more info, check out our article on growing pots and tools for successful growing.
- An evenly warm, bright location for the seedlings (if there is not enough light, grow lights are recommended)
- Seeds (as seeds or seed tape - seed tapes can also be easily made yourself)
- Cultivation containers
- Growing pallets, trays (good for large quantities of seeds)
- Cultivation pots (made of cellulose or coconut fibers), swelling tablets, egg cartons & toilet paper rolls (can be planted directly)
- flower pots, used plastic trays (clean them well beforehand)
- Soil pot press
- Growing soil
- Water (preferably in a spray bottle, so seeds don't get washed away or drown in the water)
- Signs for labeling (so you don't forget where you sowed which seeds)
Buy seed proof varieties
If you want to buy seeds, it is not so easy to find your way through the large selection of suppliers and varieties. Therefore, we give you here a few clues to guide you when buying seeds.
It is worth buying seeds instead of young plants, because there is a larger selection of different varieties. There are seed-resistant and non-seed-resistant (so-called F1 hybrids) varieties. While you can grow your own seeds from seed-stable varieties, F1 hybrids have to be purchased over and over again. The seeds of these varieties usually do not produce plants with the same characteristics again. That is why we advise you to buy organic, seed-proof seeds. In addition, you can be sure that it has not been treated with pesticides.
What is propagation soil?
Growing or seeding soil is a fine, nutrient-poor, sterilized substrate that consists of equal parts compost, sand and garden soil. Growing soil provides the optimal growing conditions for your seedlings to grow into strong, healthy plants.
Making soil for propagating yourself
It is not at all difficult to make potting soil yourself. Equal parts of well-matured compost, sand and ideally medium-heavy garden soil are mixed well. Conventional potting soil often contains peat, which you should rather do without!
Plant lamps for propagation
Light is essential for the growth and germination of seedlings. Especially in the winter months until the end of March, however, the days are still relatively dark and short. Plant lamps can help here as a supplement. This way your seedlings are guaranteed to get enough light. If the ratio of light and temperature is not correct, your seedlings may become stunted. "Wilting" means that the seedlings grow thin and weak in their search for light. Timers on the plant lights will help you save some work and not have to think about turning them on and off every day.
Seed propagation with an earth baler
A soil pot or soil baler is a good and plastic-free alternative to conventional growing containers. Because with a soil baler you make your own soil pots and only need a base for your seedlings.
Labelling plants during cultivation
Who does not know: you diligently sow all kinds of seeds, but a few days later you are no longer quite sure where you sowed which seeds. To prevent this, it is worthwhile to prepare plant labels in advance (e.g. from mouth spatulas, which you can get at the pharmacy). You can give free rein to your creativity. The main thing is that you know later which seeds you have put where. On your signs you should then write the variety and species . Especially if you sow in several sets, it is best to note the date of sowing.

Pre-swelling seeds: A good start when planting seeds
To give seeds a good start for germination and at the same time prevent diseases, you can pre-soak your seeds in chamomile tea. Especially with plant seeds that take longer to germinate, pre-swelling is worthwhile. This is the case, for example, with beans, peas, many herbs, parsnips and celery. But pre-swelling can also be worthwhile for old seeds that may no longer be as germinable.
Pre-swelling seed instructions:
- Cook chamomile tea
- Place the seeds in the brew at a maximum temperature of 30°C and leave overnight in a warm place.
- If you leave your seeds in the brew for more than 12 hours, you should change the water in between and make a new brew. The seeds should be left in the water only until the seed coat is broken.
- Sow the pre-swollen seeds normally.
Another option is to put your seeds on a kitchen towel and use a spray bottle to dust them with a little water. The seeds should be damp, but not wet. The cloth with the seeds is then placed in a plastic box or bag overnight and left in a warm place. Important: Ventilate regularly (min. 1-2 times a day), otherwise germs can develop quickly. This method is especially suitable for smaller seeds. As with the chamomile tea method, the seeds are planted in the growing soil immediately after germination starts.
How to germinate seeds?
Your seeds are not germinating? In the following section we will tell you a few things that affect germination. Each plant has its own optimal germination temperature. In addition, the seeds are sown at different depths depending on the crop and seed size.
Germination temperature
The germination temperature is especially important for successful germination. Most of the time, all the information you need is on the seed packet of the plant.
Most vegetable seeds require a starting temperature of a constant 20-25 °C. The temperature should not fluctuate too much. The temperature should not fluctuate too much, because the seeds do not like it. A cover with foil, lid or a greenhouse will help to keep the temperature and humidity high. However, you should remove these daily for a while to prevent mold from forming.
As soon as the first green peeps out of the soil, you should definitely put the plants a few degrees cooler, a good temperature is about 18 ° C. Then your plants need it also absolutely bright enough, therefore you should pay attention to sufficient light conditions.
In addition, there are so-called cold germinators or frost germinators, which must be exposed to a cold period before germination, which you can simulate in the refrigerator or freezer. Cold germinators include, for example, wild garlic, dill, cornflowers, poppy, sage and chives.
Seed germination: The right lighting conditions
Light is also the issue when it comes to whether your plants are light or dark germinators. While some plants need a lot of light to germinate, other plants prefer it a little darker. Usually, your seed packet should say how deep you should sow your seeds. Otherwise, you can use the rule of thumb that the sowing depth should be about twice as deep as your seeds are tall.
Light sprouts should never be planted too deep, but only lightly covered with soil so that they get enough light for germination. That's why it's also best to use a spray bottle to water your seeds so they don't get washed under the soil.
- Light sprouting plants:
- Basil, savory, blackberry, dill, strawberry, tarragon, garden cress, raspberry, chamomile, lettuce, cilantro, caraway, lavender, marjoram, carrots, oregano, peppermint, rosemary, sage, celery, mustard, thyme, tomatoes, lemon balm - and verbena.
- Dark sprouting plants:
- Eggplant, borage, lamb's lettuce, cucumber, pumpkin, lovage, lily, lupine, corn, parsley, chives, sunflowers, pansies, hollyhocks, lemongrass, zucchini.

Plant Knowledge at a Glance
Want to get to know your plants without digging through thick books? In the Fryd Lexicon, you’ll quickly find all the essentials about different plant types and varieties — from sowing, planting, and harvest times to companion planting, location tips, and care advice.
Explore the Lexicon NowPricking and hardening plants: A guide

When your seeds have formed the 2nd pair of leaves, it's time to prick them out. This means that you separate the plants to give them more space and stimulate root development. Then you should carefully take your sprouted plants out of their tray with a pricking stick or pencil. If you used a degradable pack or soil baler, then you can transplant the seedlings directly. However, you should not touch the seedlings by the stem, but by the leaves, because the stem can easily break. When transplanting, the plants should be placed so deep that the cotyledons touch the soil. After that you should water them a little. This way the roots of your plants will get a proper foothold.
Exceptions are the cucurbits, they don't like to be pricked out, so you should give them enough space at the beginning and rather sow them in bigger pots or bowls.
Your plantlets still need some care now. Before planting them outdoors, you should first accustom your seedlings to the conditions outside- this is also called hardening off - by putting them outside for a few hours during the day. But please do not forget to bring them back inside, otherwise they will still be too cold at night.
We wish you a lot of fun with growing your own plants and hope we could help you a little bit with the cultivation of your vegetable plants.
For questions and comments, feel free to write us at [email protected]. Want to get helpful gardening tips throughout the year and plan your own beds for the best? Then register here or download the Fryd app for Android or iOS.
Fryd - Your digital bed planner
Cover image by Markus Spiske on Unsplash

Marielena
Marielena studies agricultural and environmental sciences. She gardens at home and at an allotment and likes to try out new things.
Learn MoreCurrent Topics in the Community
Liked 4 times
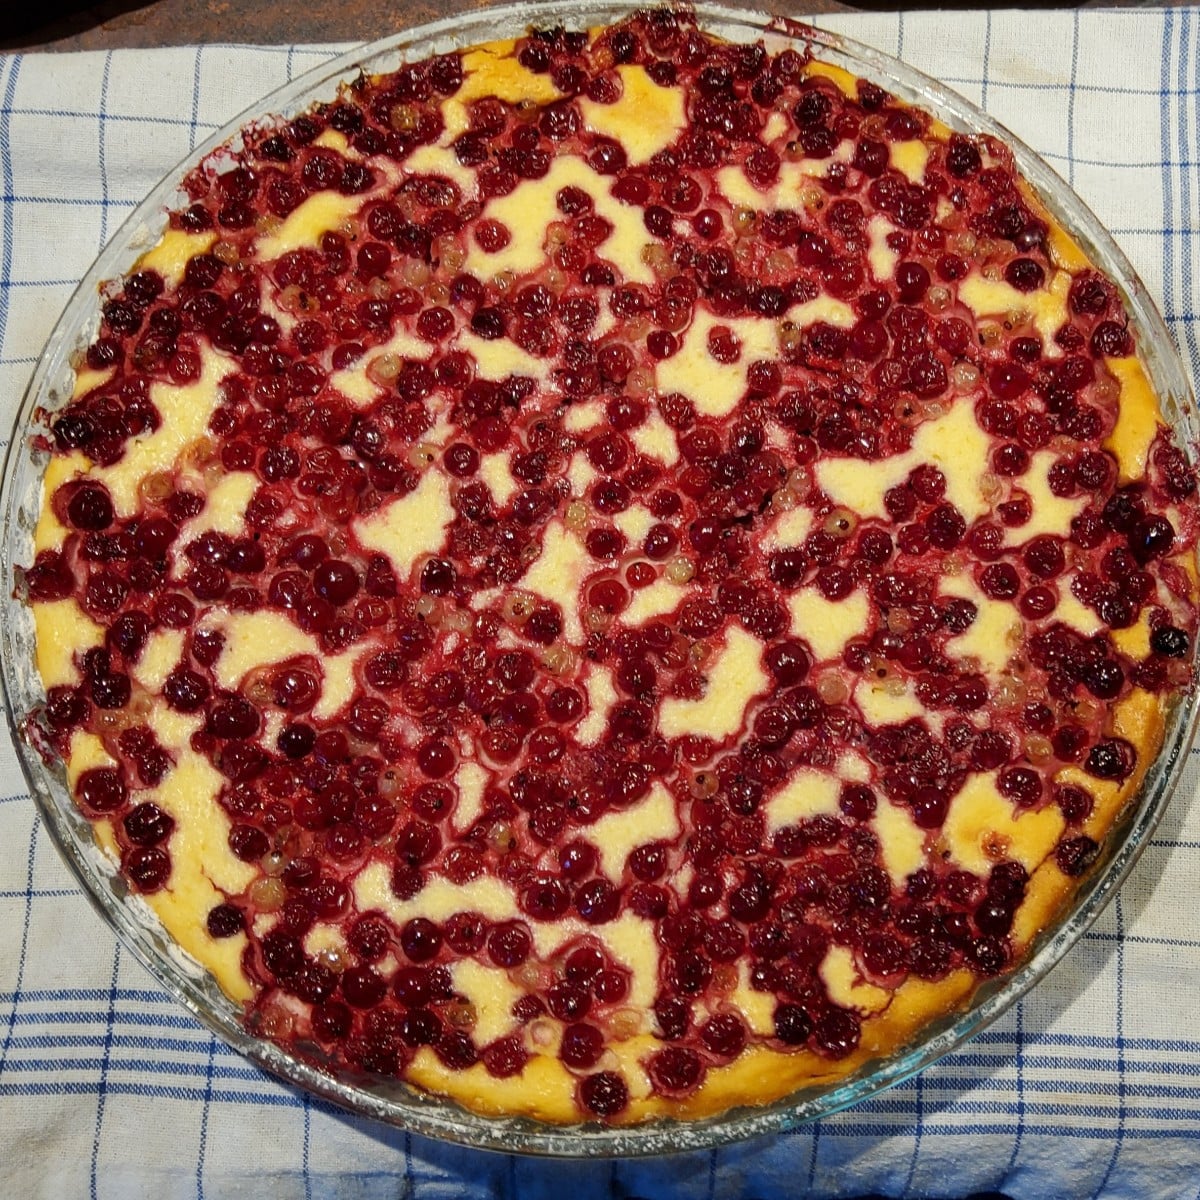
...One thing was clear right away: I won’t be making any currant jam or jelly this year...the pantry is still well-stocked with them! 🤷 ...So I’ve put the berries in the freezer for now... ...I recently stumbled upon a recipe that I’d like to share with you here: |No-Bake Cheesecake with Currants| 😋 ..inspired by: Das Kochrezept.de Equipment needed: A pie pan, mixing bowl, hand mixer, silicone spatula Total time: 70 min. Prep time: 20 min. Baking time: 50 min. Vegetable oil (for greasing) Flour (for dusting) 400 g currants 60 g very soft butter 100 g powdered sugar 1 packet vanilla sugar 3 eggs 500 g low-fat quark 200 g yogurt (1.5%) alternatively, Buko cream cheese with skyr 1 organic lemon (juice and zest) 2 tbsp semolina Preheat the oven to 180°C (top and bottom heat). Lightly brush the pie pan with oil and dust with flour. Thaw the currants (they should only be thawed enough to retain their shape). Using a hand mixer, beat the butter with the powdered sugar and vanilla sugar until creamy. Gradually add the eggs and mix them in. Stir in the quark, yogurt/cream cheese, lemon juice, lemon zest, and semolina, then pour the mixture into the pan. Scatter the berries on top and bake the cheesecake in the oven for about 50 minutes until golden brown. Remove from the oven and let cool. Store in the refrigerator and serve chilled! To keep the cake low in fat, I used low-fat quark and 1.5% yogurt! It works perfectly—the only thing I’d change next time is to use cornstarch instead of semolina; the “mouthfeel” was a bit too “gritty” for my taste...🤷
Show 1 answer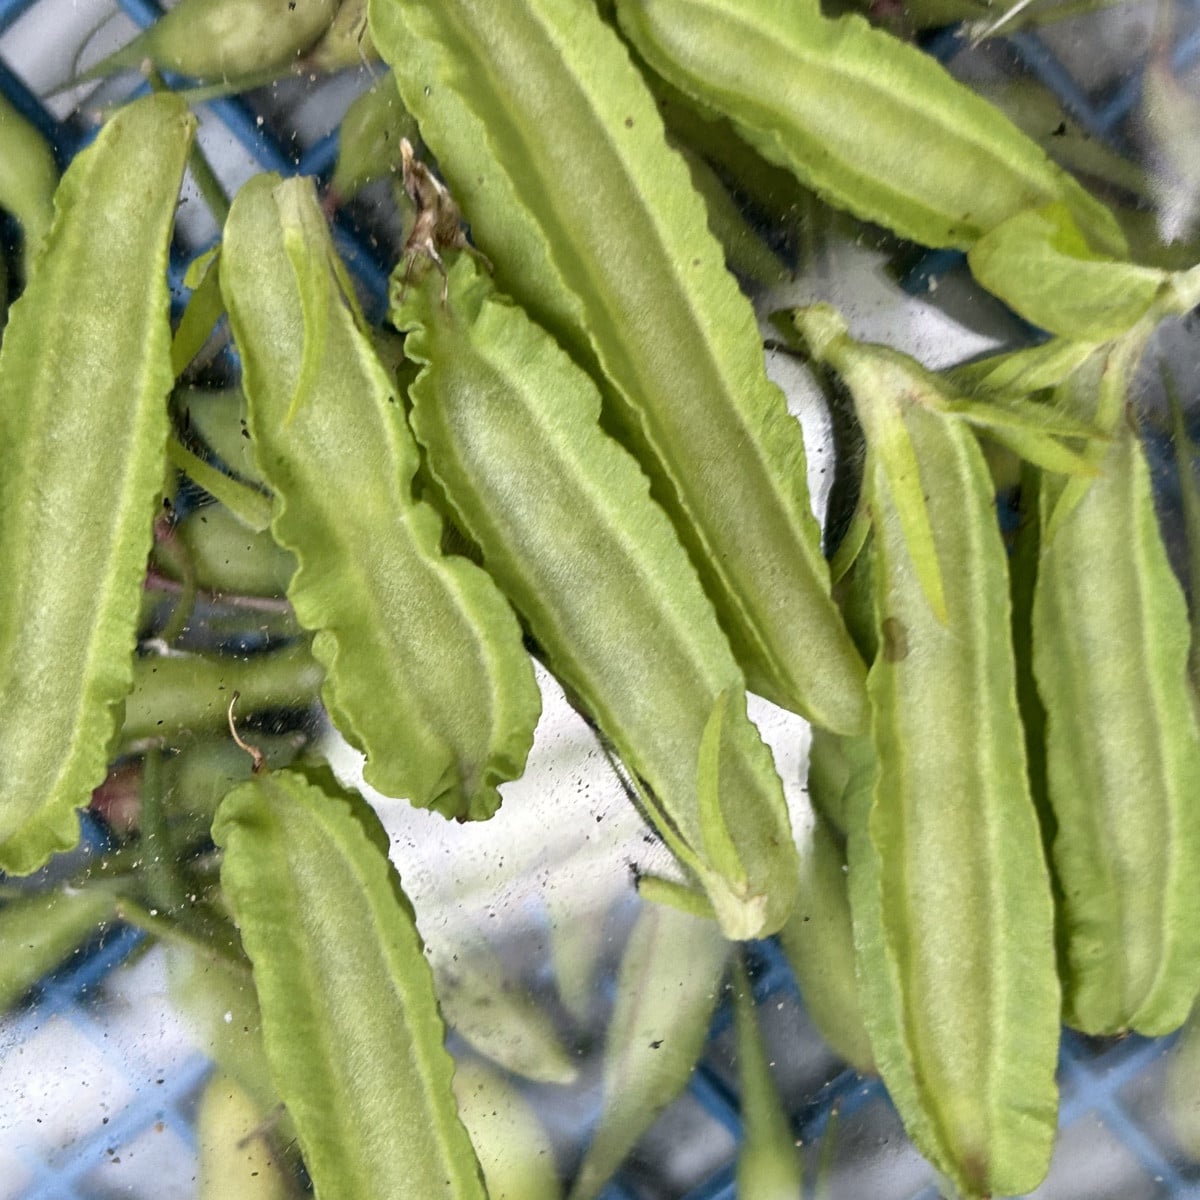
Liked 6 times
The peas have frilly edges. 😍 My first asparagus peas Tried a few small ones raw—they were okay, nothing special. Slightly nutty. Don't taste like asparagus. But they're sexy, and so is the bright red flower.
Show 2 answers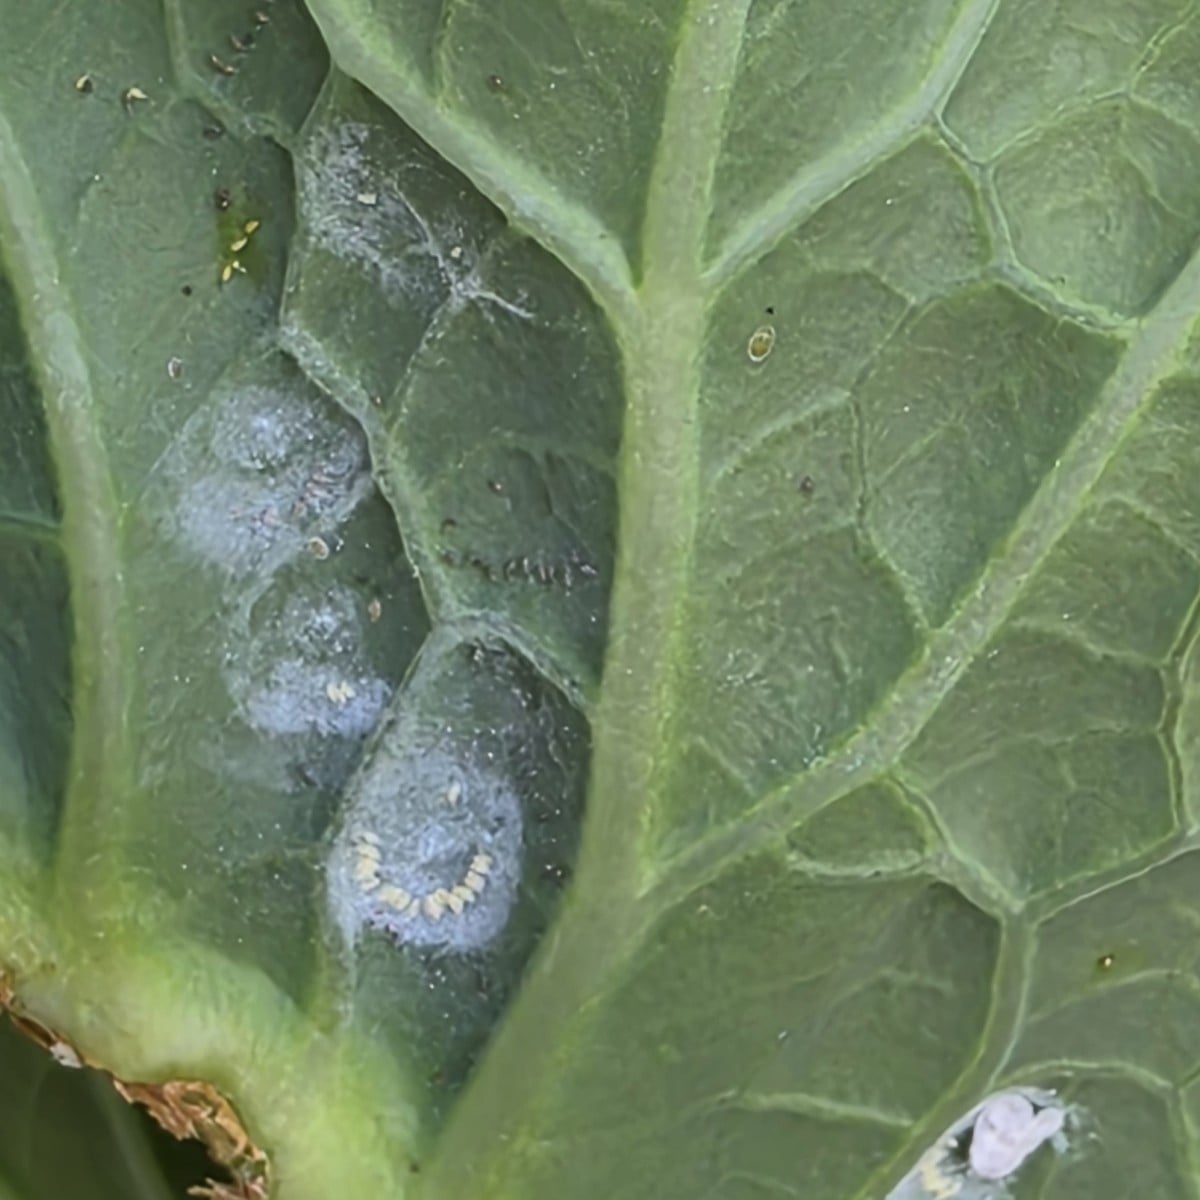
Liked 2 times
Pests in the garden😕. And I planted viper's bugloss cuttings in the vegetable garden for the bees, etc. 🐝🦋🐞
Show 1 answerPopular Articles

Gardening in March: Preparation & Cultivation

Propagating Peppers/Chillies: How to Grow Them Successfully

Cultivation or Direct Sowing: When and Which Vegetables to Propagate?

Sowing and Propagating Tomatoes: This Is How It Works

Raised Beds: Your Planting Plan for a Year

Plant Lights for Growing and Overwintering Plants

Growing Cucumbers Seedlings in Pots: Tips for Propagation

Pricking Out Vegetable Plants: Tips and Instructions

Growing & Harvesting Rocket: Good & Bad Companion Plants

How to Grow Broccoli: Tips for Cultivation
FAQ
Which vegetables should you prefer?
Plants that have a long cultivation period and are heat-loving should be grown in advance. These include nightshade plants such as peppers/chilies, tomatoes and eggplants, and cucurbits such as cucumbers, melons, pumpkins and zucchini.
What vegetables should you not prefer?
Root vegetables such as carrots, beet and radishes should be sown directly into the bed, as they have delicate roots that would be damaged if transplanted. You should also sow beans and peas directly.
What is the best way to germinate seeds?
Sufficient moisture, enough light, the right temperature, growing soil and seed depth are the be-all and end-all when raising seeds. By pre-swelling your seeds you can give them an advance, especially with poorly germinating or old seeds this can be very helpful.
How deep should you put seeds in the ground?
Usually, your seed packet should say how deep you should sow your seeds. Otherwise, you can use the rule of thumb that the sowing depth should be about twice as deep as your seeds are big.
What vegetables should not be pricked?
When your seeds have formed the 2nd pair of leaves, it's time to prick them out. This means that you separate the plants to give them more space and stimulate root development. Exceptions are the cucurbits, they don't like to be pricked out at all, so you should give them enough space already at the beginning and rather sow them in bigger pots or trays.